PIXMA MX494 Wi-Fi Setup Guide
Some access points (often called routers or hubs) feature an automatic connection button labelled “WPS” which stands for Wi-Fi Protected Setup and allows permitted devices to connect to your network without needing to enter a password. This is the easiest way of connecting your PIXMA printer, so if your access point has a WPS button please select ‘WPS Connection Method’ below for instructions on connecting using this method.
If your access point does not support WPS, please select 'Standard Connection Method' below.
WPS Connection Method
Before we start, there are some conditions that must be met in order to use the WPS push button method:
-
The access point must have a physical WPS push button available. Please check with your device’s user guide for details. If the WPS push button is not available please use the instructions in the Standard Connection Method.
- Your network must be using the WPA (Wi-Fi Protected Access) or WPA2 security protocol. Most WPS enabled access points use this protocol.
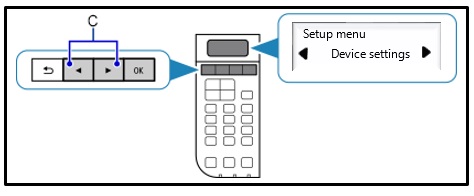
- Press the [Setup] button (B) on the printer.

- Use the arrow buttons (C) to select [Device settings] and press the [OK] button.
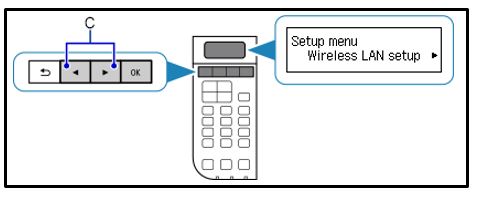
- Use the arrow buttons (C) to select [Wireless LAN setup] and press the [OK] button.
- The printer will now automatically search for access points supporting the WPS feature.
The following message will be displayed on the printer’s screen “Press WPS button of the wireless router about 5 sec. and press [OK] on this printer”
- Press and hold the [WPS] button on your access point for approximately 5 seconds, then release.
For exact instructions on starting WPS on your access point, please refer to its user guide.
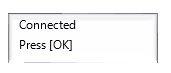
- Press the [OK] button on the printer within 2 minutes. Once connected, the following screen will appear. Press the [OK] button to complete the setup.
If another screen appears, please refer to “troubleshooting” in the user guide.
To confirm that your printer is successfully connected to your wireless network, you can print out the network settings of your printer if you wish:
- Make sure that your printer is turned on.
- Load a sheet of A4 or Letter-sized plain paper.
- Press the [Setup] button (B) on the printer
- Use the arrow button (C) to select [Device settings] and press the [OK] button.
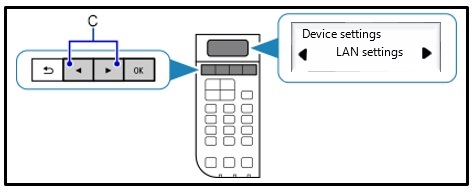
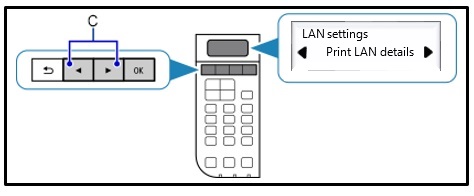
- Use the arrow button (C) to select [LAN settings] and press the [OK] button.
- Use the arrow button (C) to select [Print LAN details] and press the [OK] button.
The network information page will be printed.
When referring to the printout, check that the “Connection” indicates “Active” and that the SSID -Service Set Identifier (or the name of your wireless network) indicates the correct name of your wireless network.
This concludes the WPS setup procedure.
Please now proceed by installing the software to make the most out of your PIXMA MX494.
If you do not have the installation CD that came with your product, please download the manuals and software.
If the wireless setup is still failing after following this guide, please contact us for further assistance.
Standard Connection Method
- Press the [Setup] button (B) on the printer.
- Use the arrow buttons (C) to select [Device settings] and press the [OK] button.
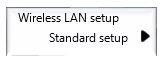
- Use the arrow buttons (C) to select [Wireless LAN setup] and press the [OK] button.
- Press the [Stop/Reset]
 button and the following screen will be displayed, press the [OK] button.
The printer will now search all available wireless networks in the immediate vicinity.
- Use the arrow keys to select the name of your network (also referred to as SSID) and press the [OK] button twice.
If you are unsure of the name of your wireless network, it may be on a printed label on your access point, or you can check the network your computer is connected to.
If you cannot see your network listed, use the arrow keys to select [Search again] and press the [OK] button.
- When the following screen appears, use the numeric buttons on the machine to enter the security passphrase of your wireless network.
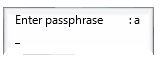
The machine has three input modes: uppercase mode, lowercase mode, and numeric mode. Press the [ ] button to switch to the uppercase mode (A), lowercase mode (a), or numeric mode (1). This is displayed in top right of screen.
For example, in the uppercase mode, pressing the button once will give you "A" and pressing the button twice will give you "B" etc. If you have 2 characters contained within the same button, press the arrow key to advance to the next character. If you accidentally make a mistake, you can delete the character by pressing the
  key. Once you have finished entering the passphrase, press the [OK] button.
- Once connected, the following screen will appear. Press the [OK] button to complete the setup.
This concludes the Wi-Fi setup procedure. Please now install the provided software.
If you do not have the installation CD that came with your product, please download the manuals and software.
To confirm that your printer is successfully connected to your wireless network, you can print out the network settings of your printer if you wish:
- Make sure that your printer is turned on.
- Load a sheet of A4 or Letter-sized plain paper.
- Press the [Setup] button (B) on the printer
- Use the arrow button (C) to select [Device settings] and press the [OK] button.
- Use the arrow button (C) to select [LAN settings] and press the [OK] button.
- Use the arrow button (C) to select [Print LAN details] and press the [OK] button.
The network information page will be printed.
When referring to the printout, check that the “Connection” indicates “Active” and that the SSID -Service Set Identifier (or the name of your wireless network) indicates the correct name of your wireless network.
This concludes the WPS setup procedure.
Please now proceed by installing the software to make the most out of your PIXMA MX494.
If you do not have the installation CD that came with your product, please download the manuals and software.
If the wireless setup is still failing after following this guide, please contact us for further assistance.
Restoring Network Settings to Factory Default
If you need to reset your network settings back to factory default, for example if you change your access point, you can do so by following these instructions:
- Press the [Setup] button (B) on the printer.
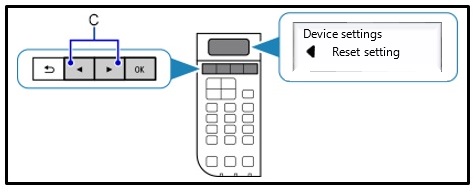
- Use the arrow buttons (C) to select [Device settings] and press the [OK] button.
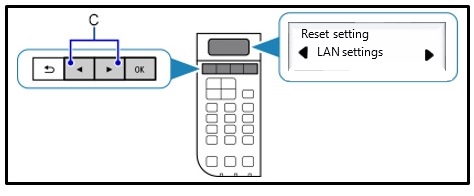
- Use the arrow buttons to select [Reset setting] and press the [OK] button.
- Use the arrow buttons to select [LAN settings] and press the [OK] button.
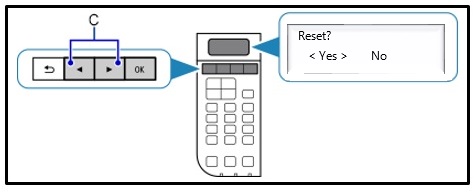
- Use the arrow buttons to select [Yes] and press the [OK] button.
The wireless network settings have been reset back to factory default settings.
Press the [Copy] button to return to the home screen.
If this process is still failing after following this guide, please contact us for further assistance.